
3.3 Lead employees in a group
A work group brings you together with AI employees working on the same goal. The interface's Create group action creates a work group. You set the goal, provide materials, and correct direction. Employees respond within their responsibilities and permissions.
Prepare your employees
First create the employees you need in Employees, with clear responsibilities and deliverables. Make sure employees who will perform the work are active and have a working model configuration. Joining a group does not automatically grant new tool permissions.
Create a group
- On the Conversations page, select + (New) and choose Create collaboration group.
- In About, enter a group name, add a description if you like, choose the business scope (Cross-business (General) by default, or the business you started from), and select Next.
- In Members, select Add members, choose the participating employees, and select Done selecting (at least 2 members, including you). Then select Create collaboration group.
- In the group, start with a message that states the goal, input materials, and deliverables.
You can also describe the group you want in one message in your own regular conversation (its name, goal, and members). The assistant checks your employee directory first and creates the group only on your explicit instruction. Members can respond in the group by default, but joining does not grant them access to materials, and the assistant does not send messages for you.
For example:
We are preparing a product research brief.
Research employee: organize the materials I provide and label facts and inferences.
Writing employee: produce a first draft from the reviewed materials.
Review employee: check sources, omissions, and overstated claims.
Keep all results here for my review before they are used.
This describes how to divide the work. It does not mean a group message automatically creates a complete set of task dependencies. Create separate tasks when you need to track independent deliverables, and review their task records.
How employees organize task teams
In a marketing work group, Alice owns content and Bob owns data analysis. Alice can organize a task team with task assistants gathering material and reviewing copy. Bob can organize another to check data and analyze changes. Alice and Bob each summarize their results and report back to the work group.
The work group retains business discussions and employee responsibilities; each task team serves the current task. Task assistants do not automatically become employees or gain permissions, and member messages cannot replace your approval. An ordinary conversation's lead assistant can also start a task team without creating a group first. See the native capability guide for entry points and availability in the current release.
Add more members
Open the Members panel from the group header, select Add members, choose the employees to add, and confirm. Then check that they appear in the member list.
Available candidates depend on employee status, business scope, and current permissions. If an employee is missing from the candidate list, return to Employees and check its configuration.
Mentions and thread replies
The collapsible formatting toolbar above the composer supports bold, italic, links, lists, quotes, and code. Use + for attachments, Aa to toggle formatting, and the emoji or @ buttons to add context. Send stays on the right. The material picker supports search and multiple selections, shown above the message box.
Groups and threads keep separate unsent drafts. Switching groups retains each draft's text, materials, and attachments without mixing them. Refreshing the current tab restores text, materials, and mentions; files must be added again. If sending fails, check the result before retrying to avoid duplicates.
To address a specific employee, type @ in the message box and select the member. To follow up on an existing message, select Reply in topic below it (or its thread summary when it already has replies) and add materials or requests within the same discussion.
An employee's reply to a message in the main stream appears directly in the main stream, with a Reply excerpt of the original message that you can select to jump back to it. For a message sent inside a topic, the reply stays in that topic. The thread summary below the main message shows responders' avatars, the reply count, and the time of the latest reply. The full context remains in the thread. A reply count alone does not show that the work is complete.
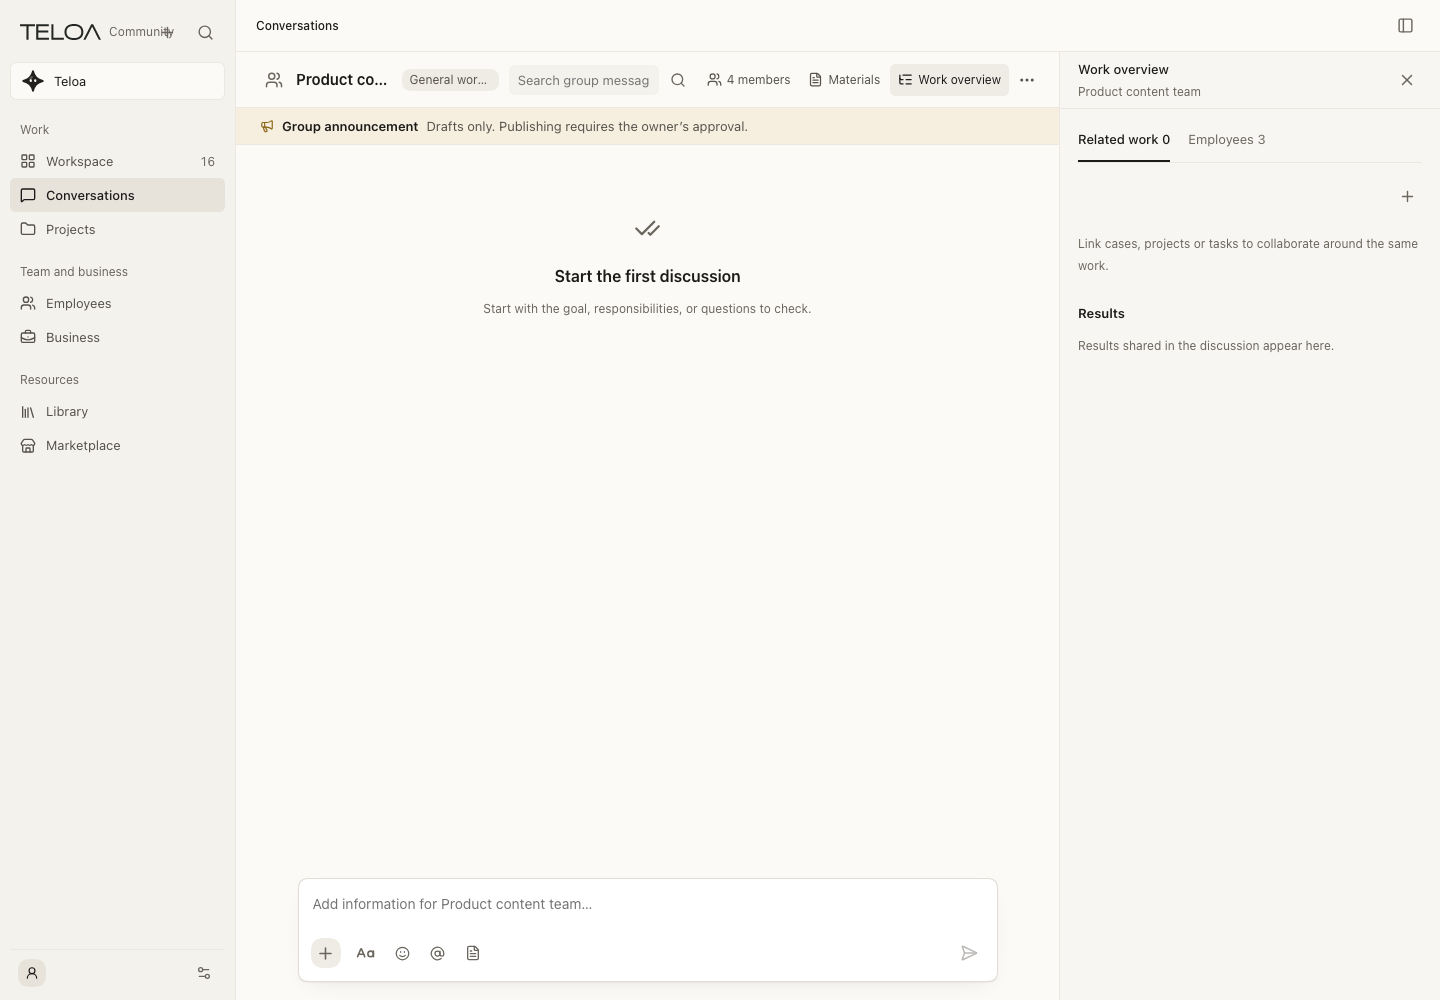
0.2.4 actual interface with example data. An example group before its first discussion, with its work overview. Membership and related work come from actual records.
Share attachments
Upload materials through the attachment option in the group message composer. After sending, check the attachment in the message and confirm that the upload succeeded, then mention the employee responsible for handling it.
A successful upload does not mean a particular run successfully read the file. For conclusions based on file contents, ask the employee to identify the file and evidence it used. Check the run records if reading failed.
Adjust group settings
Group settings include the name, announcement, members, and collaboration rules. Choose the business scope when creating the group. The current settings determine whether new members can see history, whether drafts are visible in the group, and whether everyone can be mentioned. After changing them, return to the group and check the members and settings.
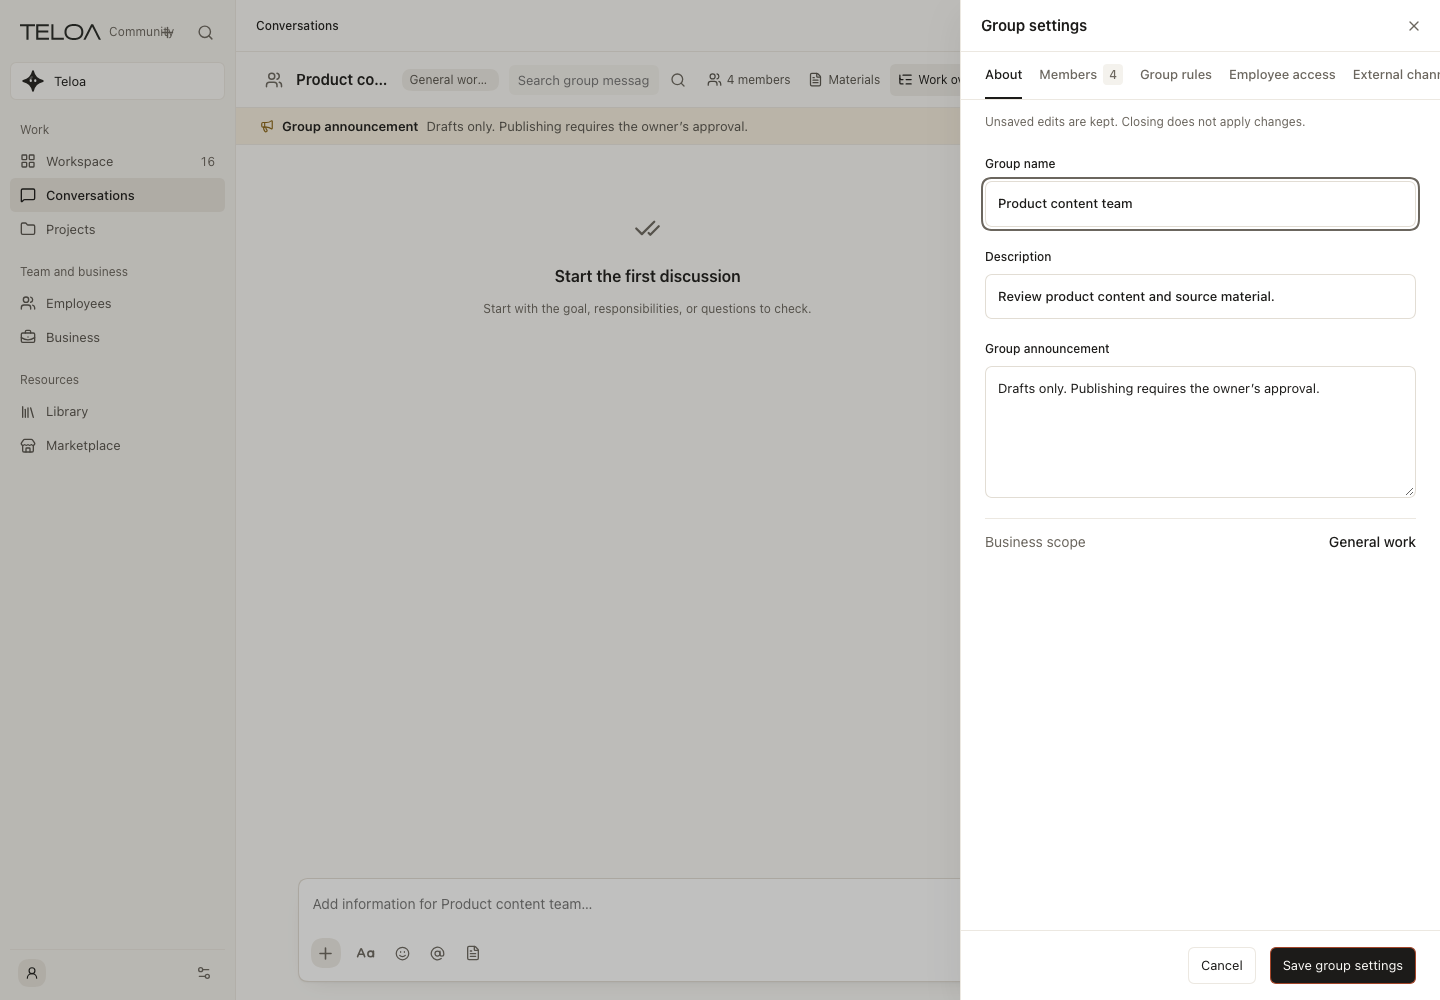
0.2.4 actual interface with example data. Group settings with its name, description, announcement and business scope. Closing does not save edits.
If there is no response
While employees work, their avatars and status (such as “Replying…” or “In progress”) appear above the message box; afterwards only View work stays under your message. If there is no response, check in this order:
- Confirm that the message was sent and the mentioned employees are group members. One message can mention up to 8 employees, and @everyone needs the group rule.
- Read the notice under your message, such as “No employee can respond,” “Could not arrange a response,” “Cannot proceed,” “Needs your approval,” or “Needs checking,” and follow it.
- In group settings, check Members and Employee access for availability and business coverage. If “Allow this group to start runs automatically” is off, a mention only creates a pending task.
- Select Arrange again when it appears, or @-mention an employee directly. Use View work to open the original work and tell model failures, missing permissions, and unavailable materials apart.
- Resolve the missing requirements before assigning the work again. Repeated messages can create duplicate work.
Verify the results
Group messages support communication and follow-up. Work with independently reviewable deliverables should have a clear task goal and output. Check sources, completeness, and unresolved questions before deciding whether to proceed with external actions.
Reuse a team
Use the group’s team-sharing action to select employees and a coordinator, then review the fixed template contents. This shares definitions, not the group’s message history or authorization. Follow Develop team templates and Sharing and receiving; receivers add their own copies and explicitly form their group.